
Custom fields
Custom fields let you record information the platform does not ship with — a vendor tier, a service region, an internal reference — on your third parties and contracts, alongside the standard fields.
Set them up before you import vendors in bulk. The import template is built from the custom fields that exist at the moment you download it, and a file without those columns imports cleanly with every custom field left empty. There is no second import that fixes it afterwards, so the order you work in decides whether you fill these fields in once or by hand.
Overview
Navigate to: Left menu: Configuration, then Custom fields.
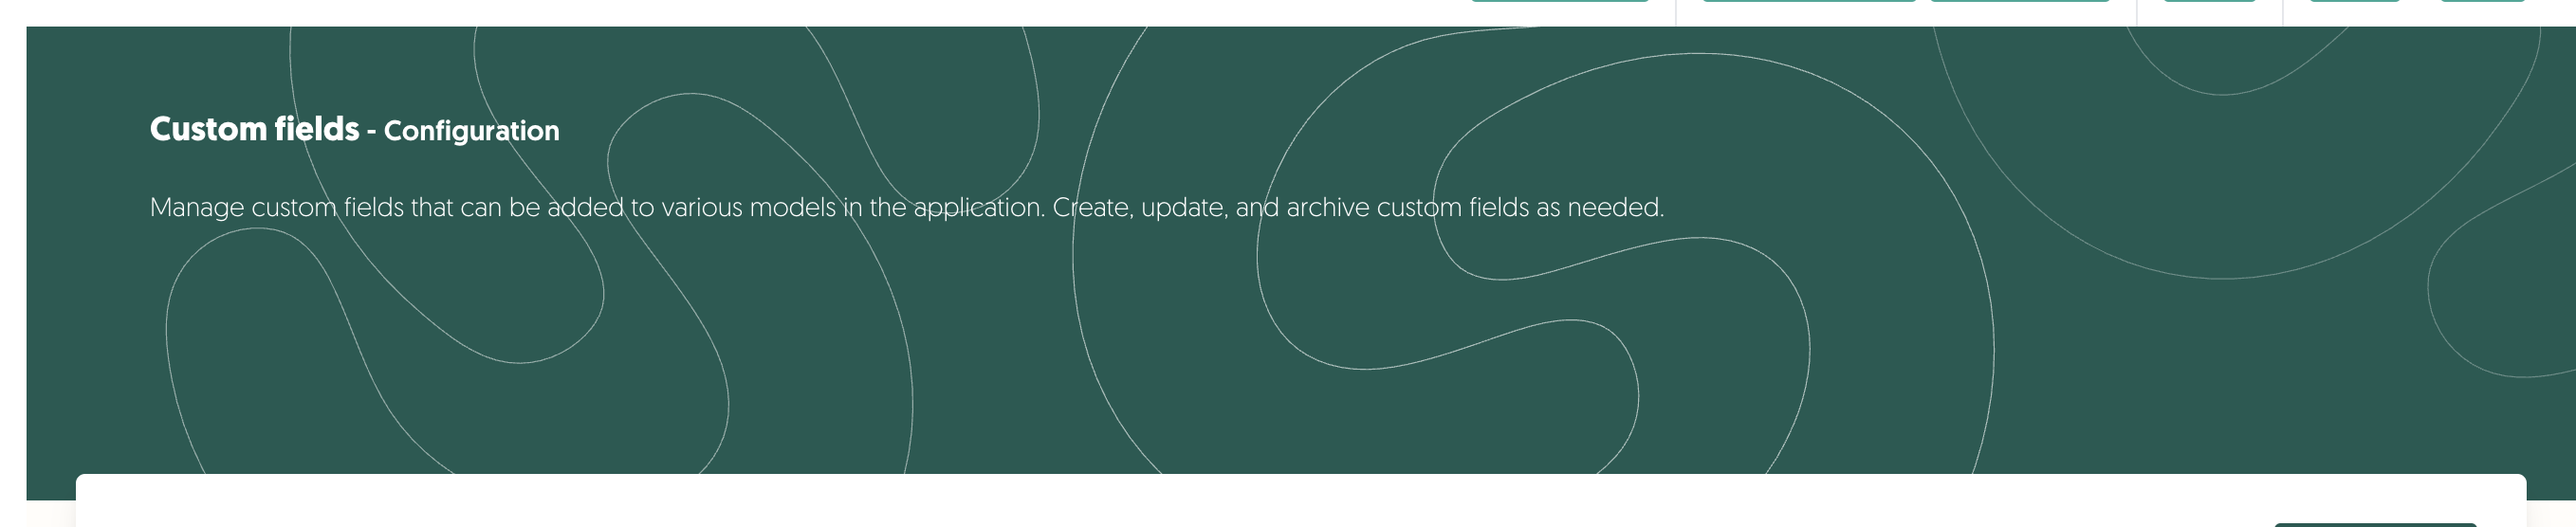
A custom field belongs to one module. Third parties and contracts are the two you will use day to day; external registration forms use them as well. Risks and controls do not support custom fields.
1. The Custom fields page
The page has three blocks, from top to bottom: Custom tabs, Custom field categories and Custom Fields Overview. Each has its own search box and its own ••• actions per row.
Custom tabs
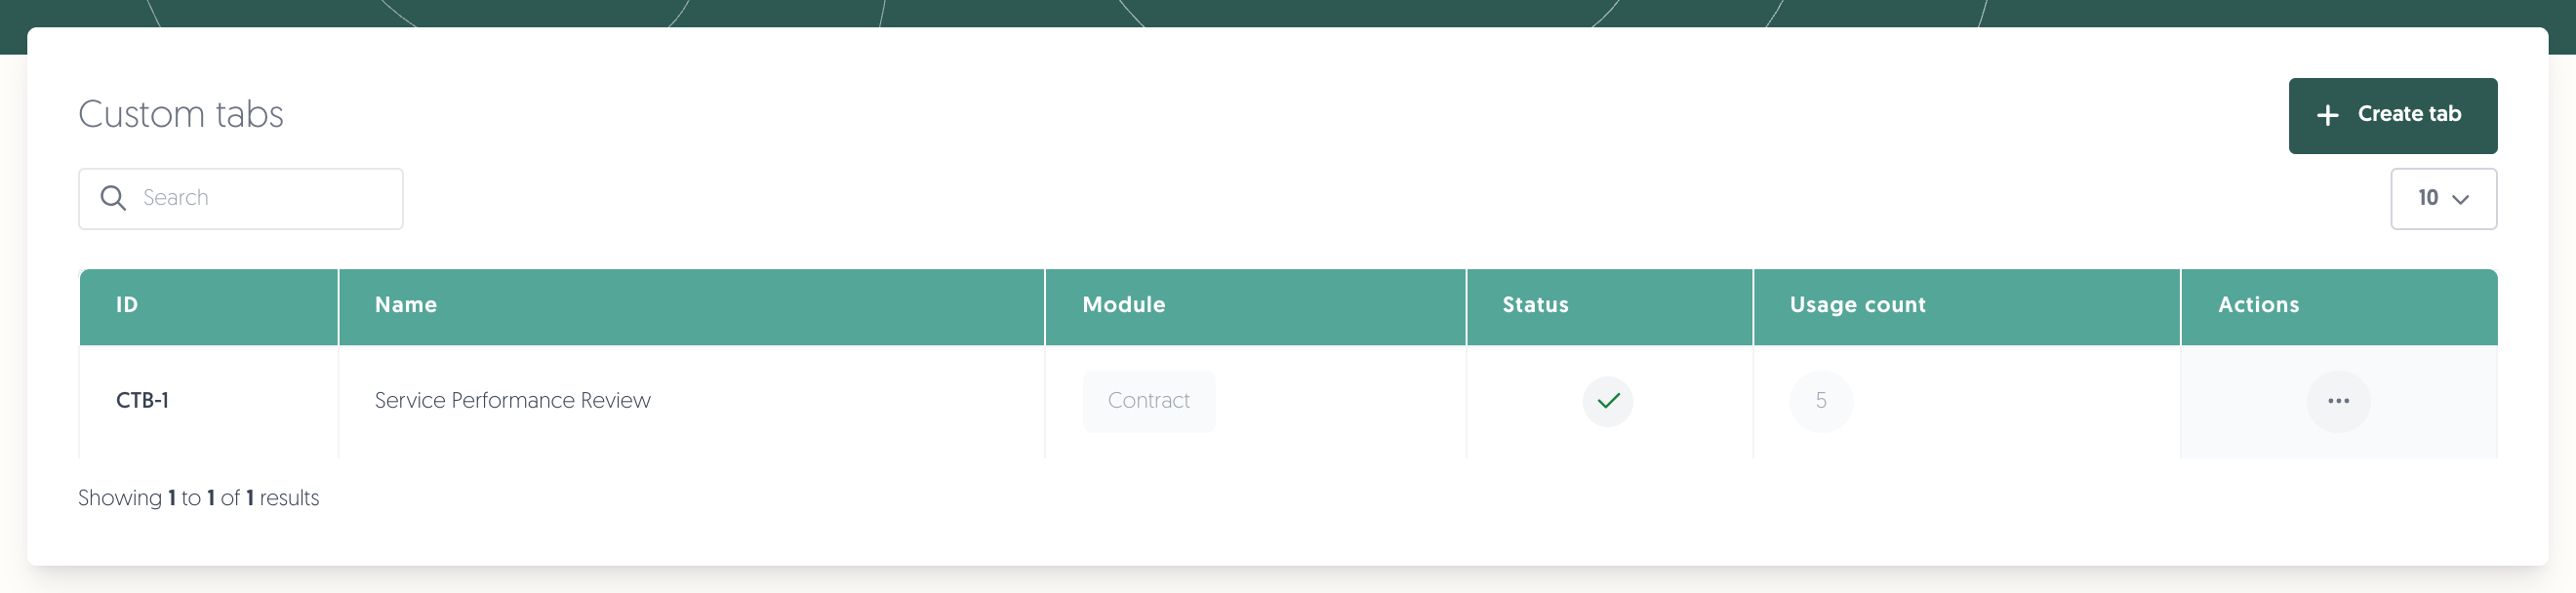
A custom tab gives a group of fields their own tab on the record, instead of showing them among the standard custom fields. Usage count here is the number of fields assigned to the tab.
Custom field categories
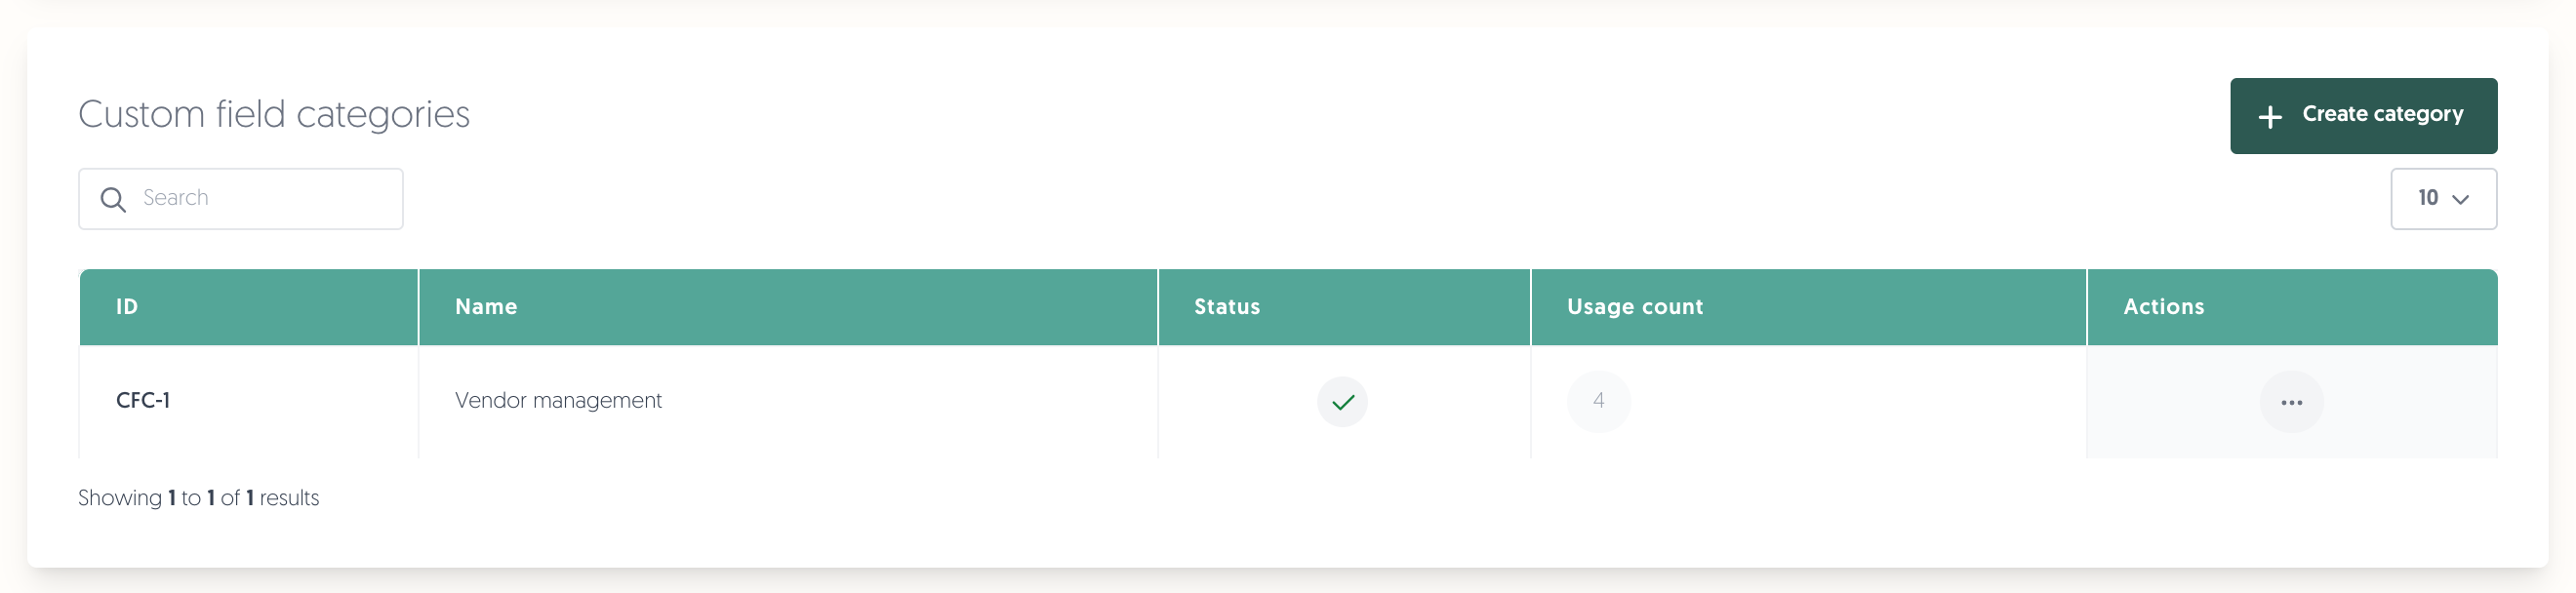
A category groups fields together under a heading. Usage count is the number of fields in the category.
Custom Fields Overview
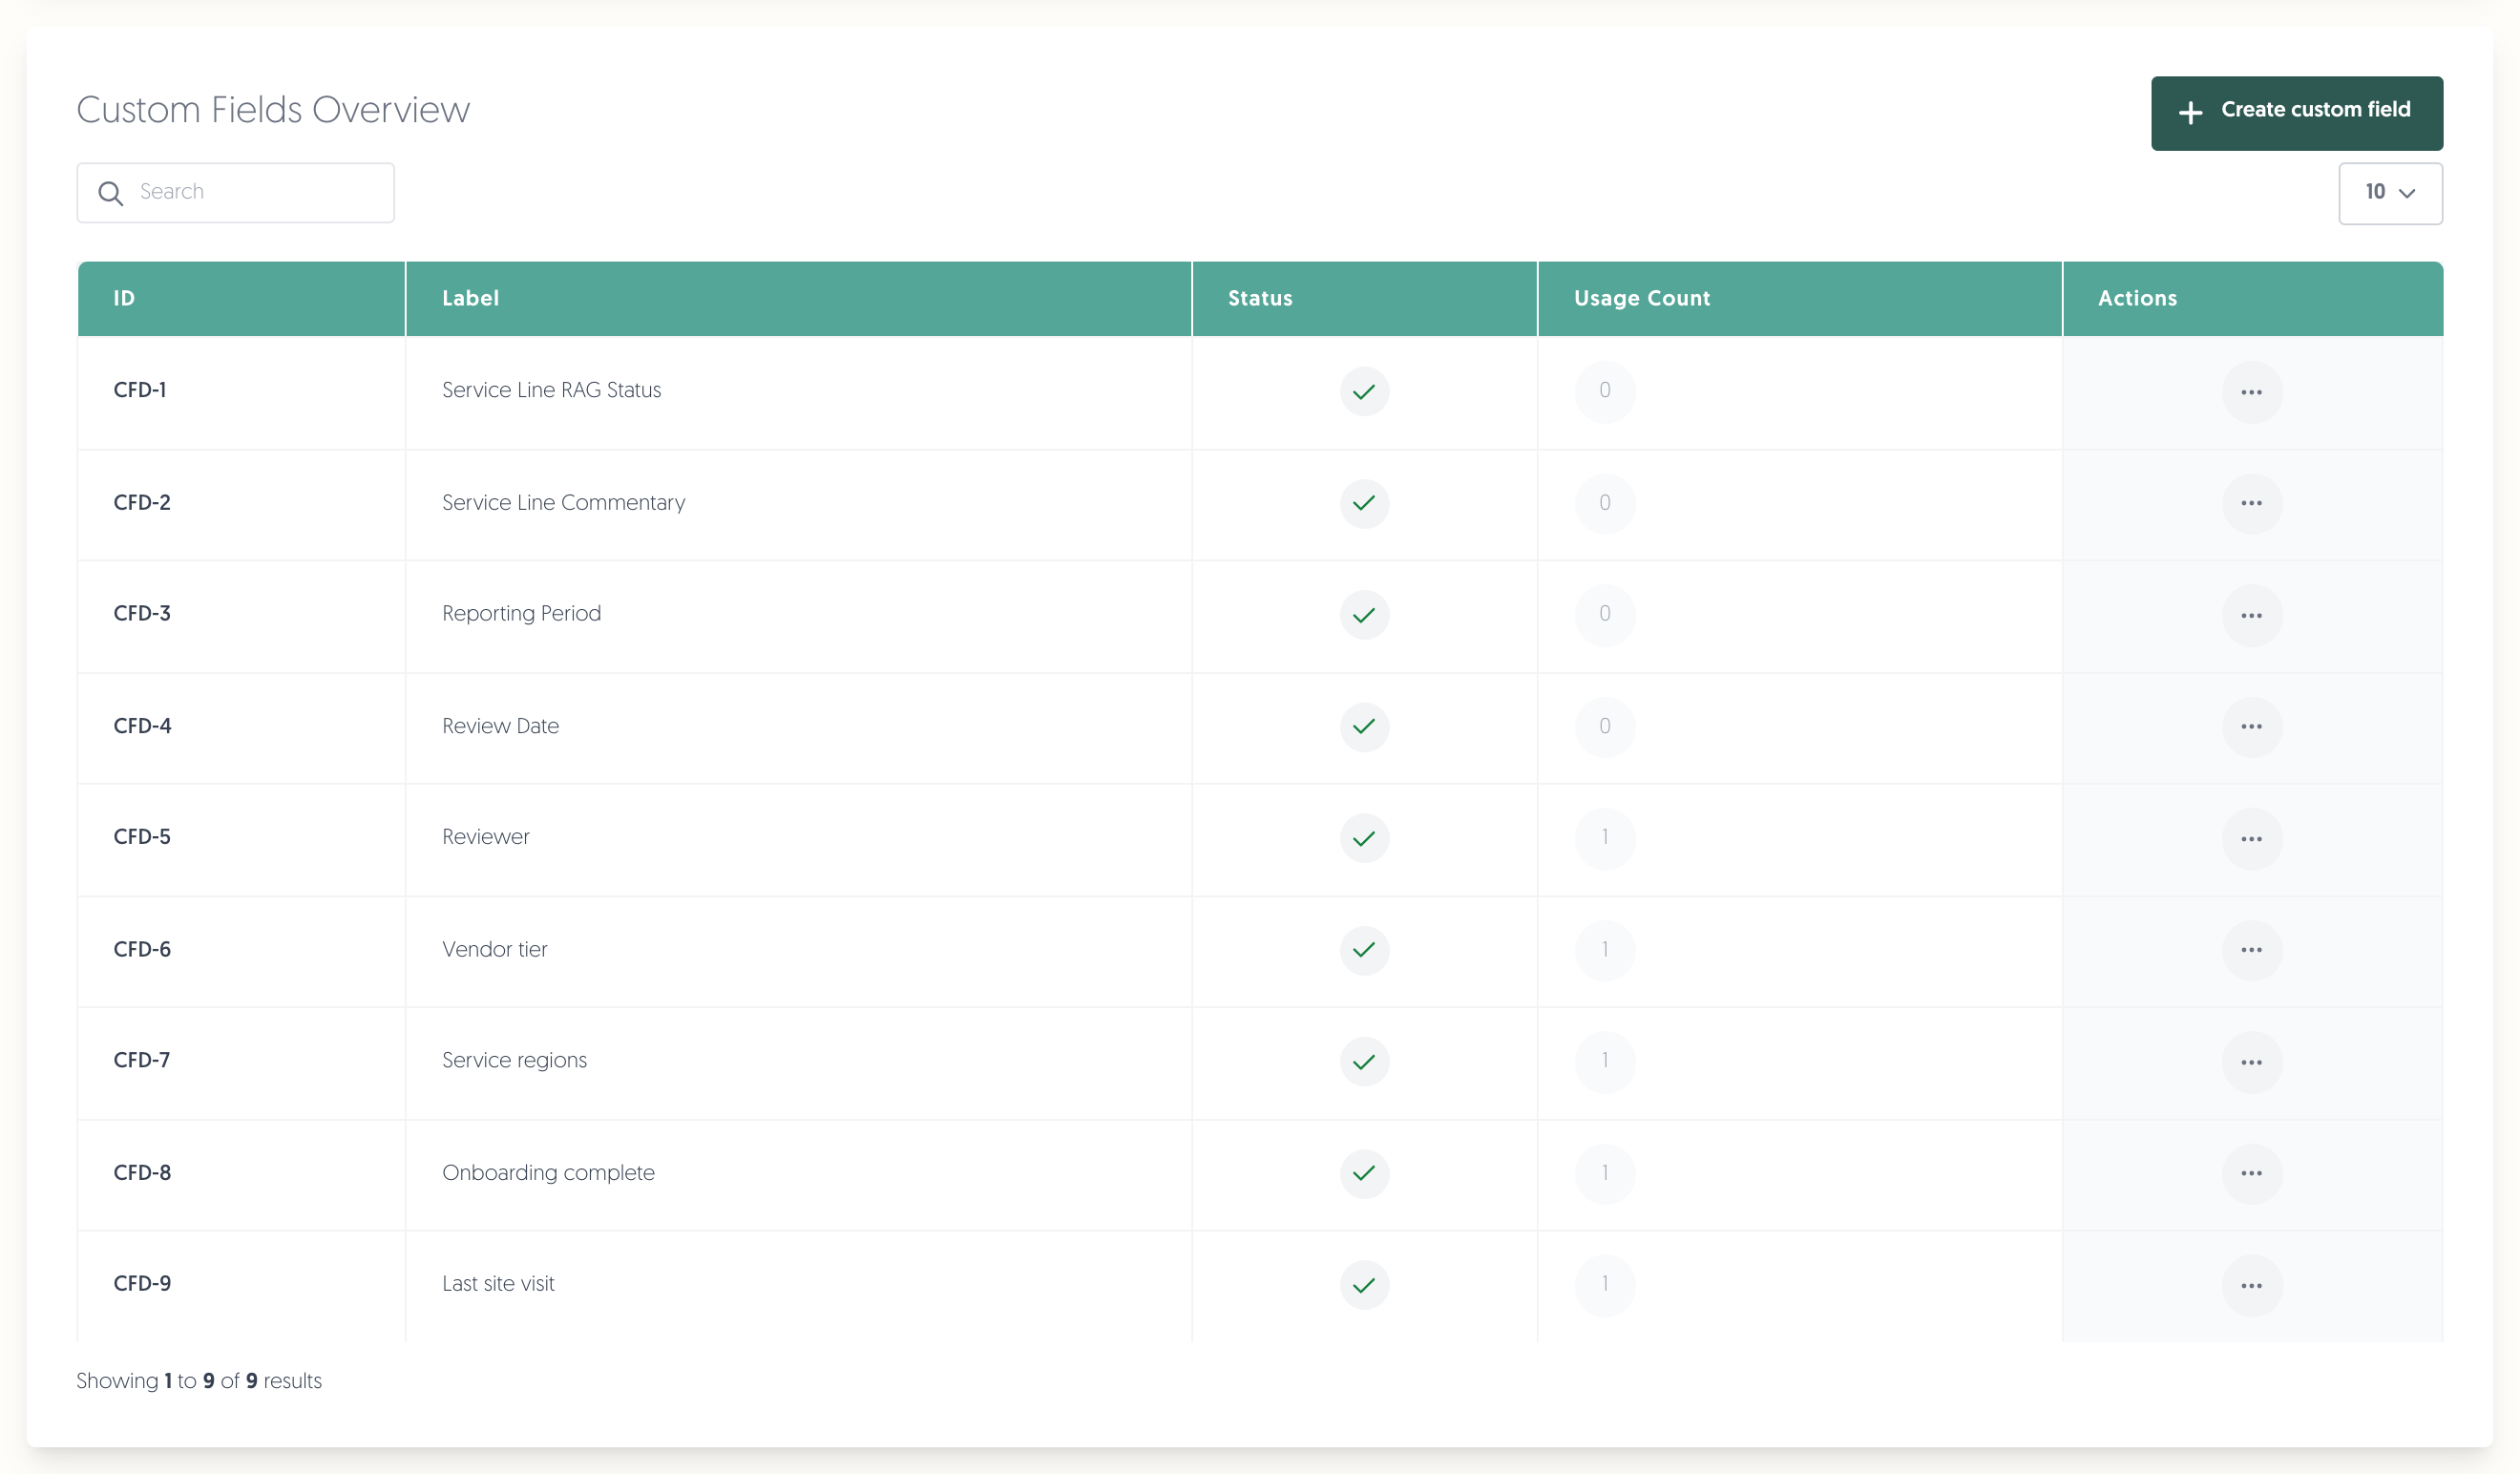
- ID: the reference for the field, for example CFD-6.
- Label: the name your colleagues see on the record.
- Status: whether the field is active or archived.
- Usage Count: how many records hold a value for this field.
- Actions: Edit, Archive and Delete.
Note: Usage Count counts records where the field actually holds a value. A field whose values have all been cleared reads as unused, even though the records still exist.
2. Create a custom field
- Navigate to: Left menu: Configuration, then Custom fields.
- Click on + Create custom field.
- Fill in the Label, choose a Field Type and a Module.
- Click on Save.
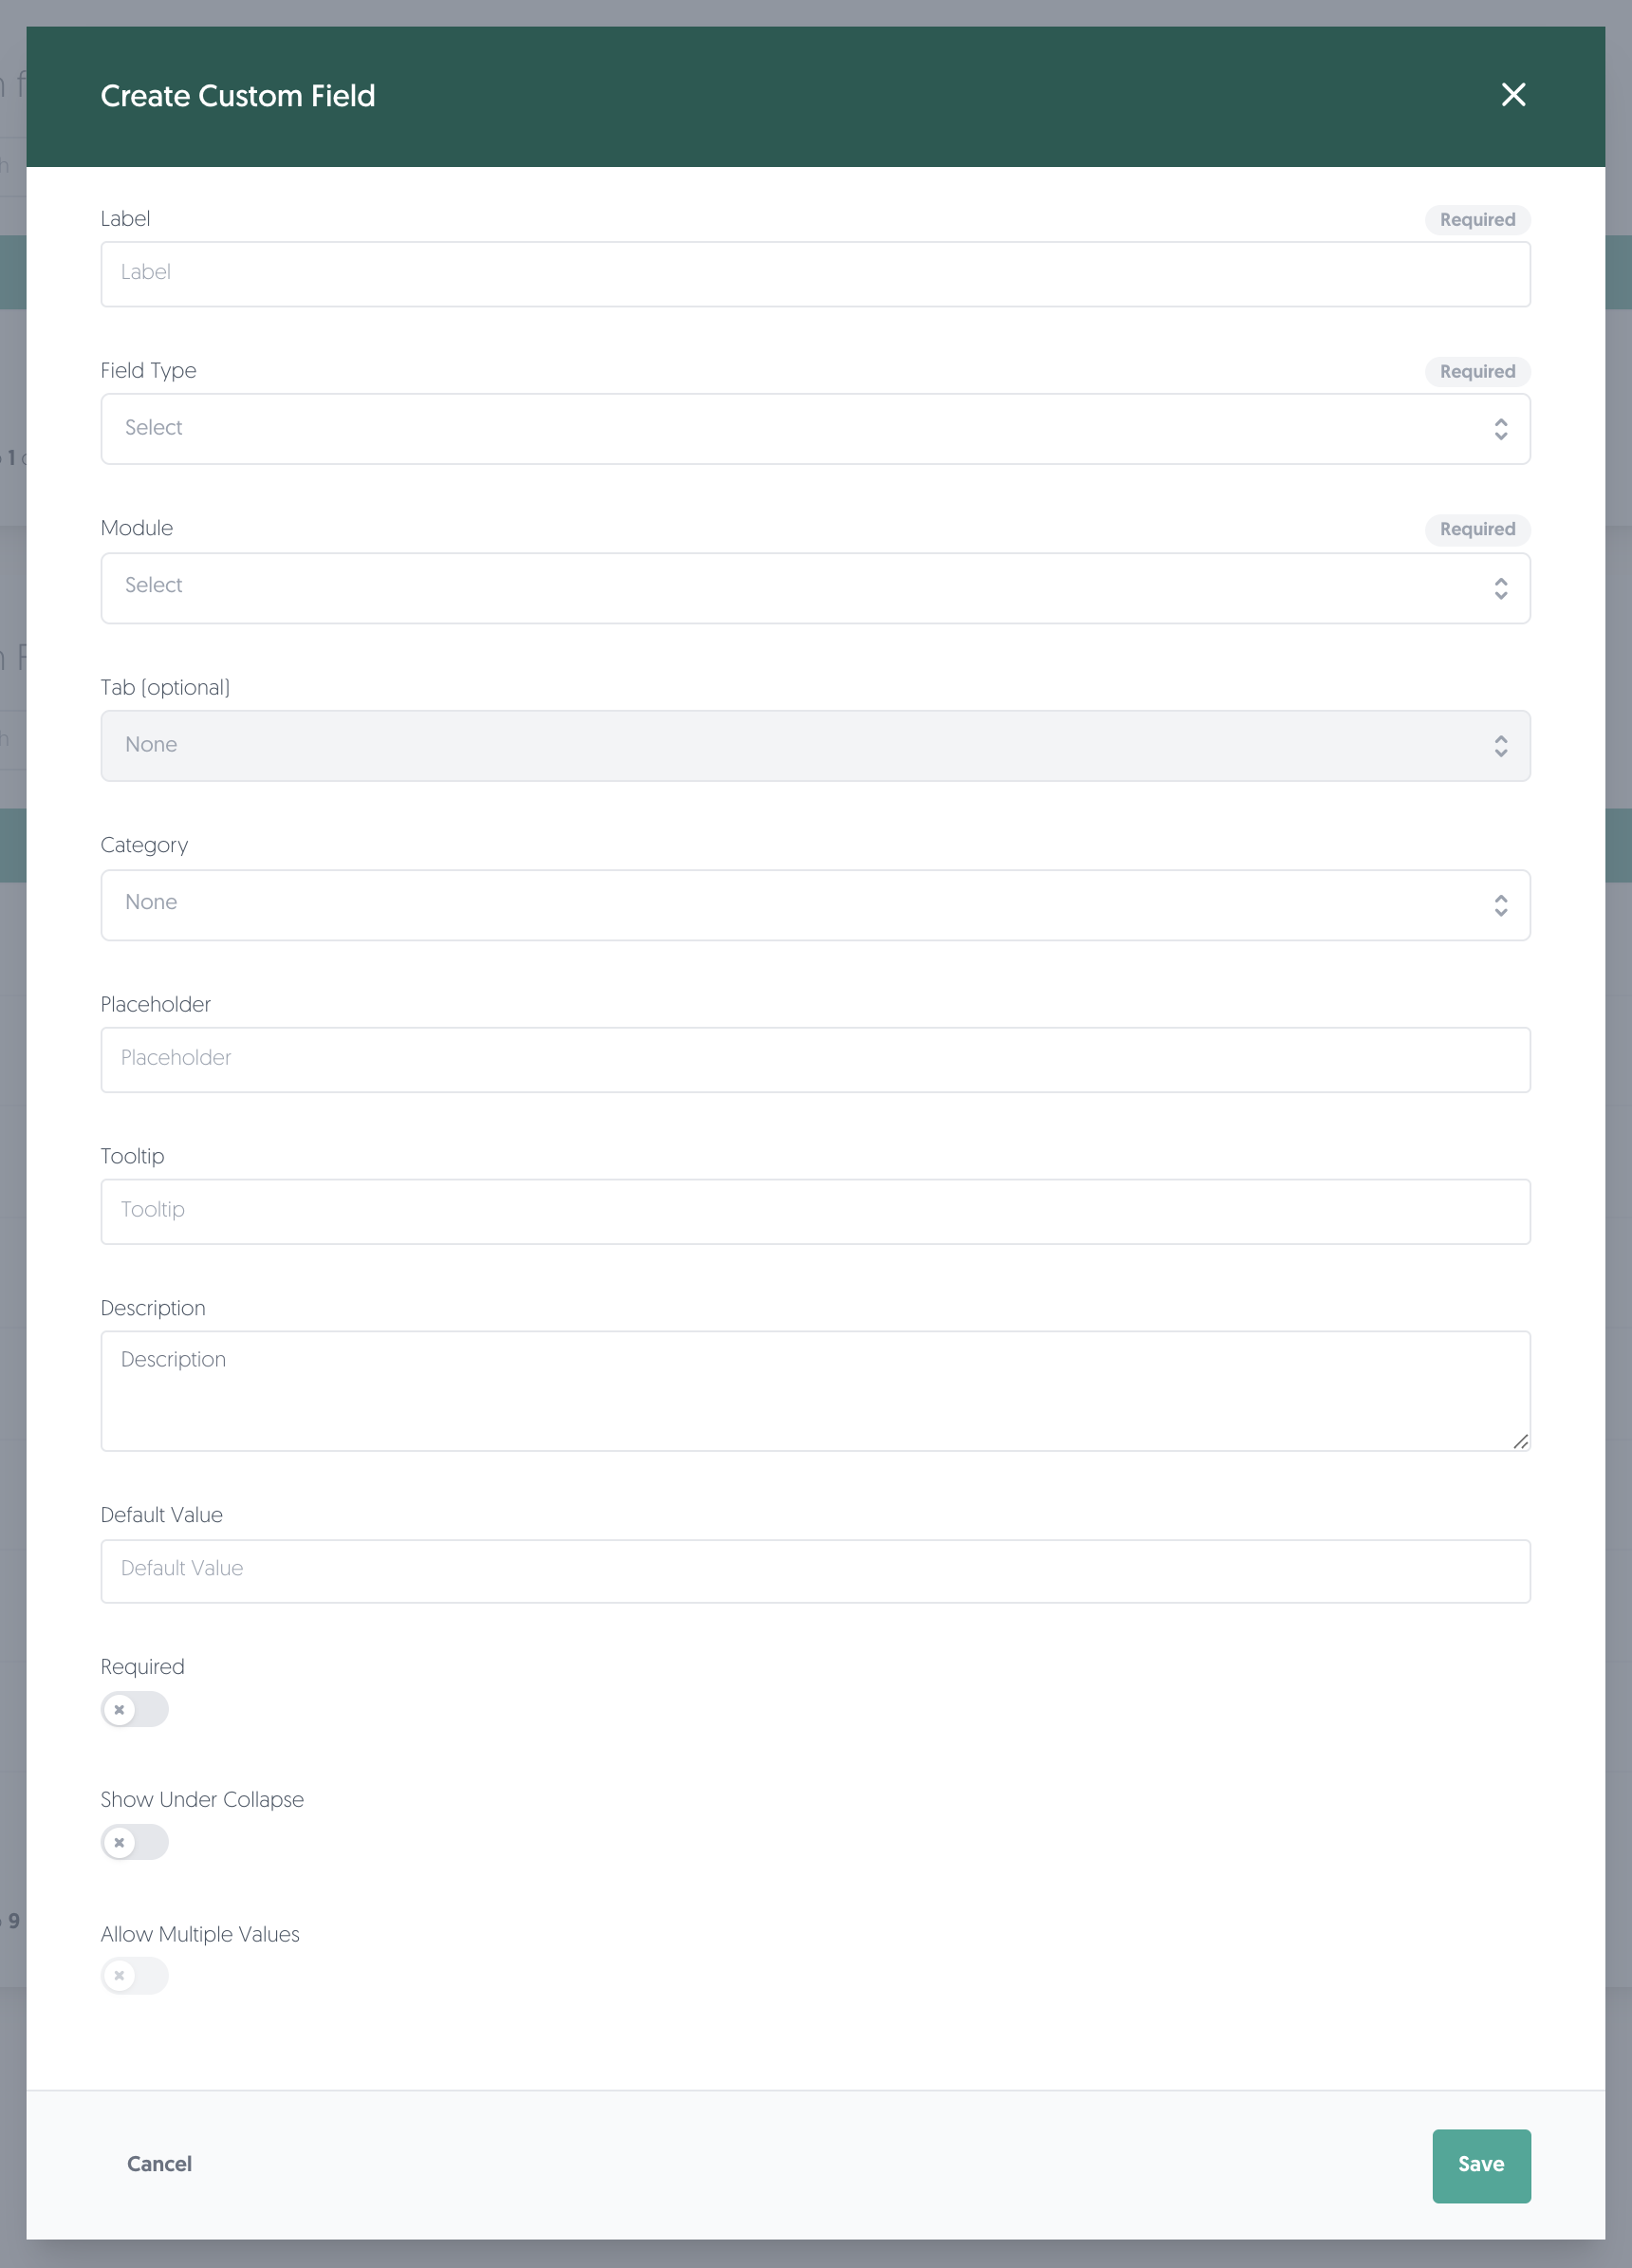
Field types
Type | What it gives the user |
|---|---|
Text | A single line of free text. |
Wysiwyg | A rich text box, for longer commentary. |
Date | A date picker. |
Select | A dropdown of options you define yourself. |
Model select | A dropdown of records that already exist in the platform, such as users. |
Toggle | A yes/no switch. |
Allow Multiple Values works only on Select and Model select. On any other type it has no effect.
The other settings
- Tab (optional): put the field on its own tab instead of with the rest.
- Category: group the field under a heading.
- Placeholder, Tooltip, Description: help text for whoever fills the field in.
- Default Value: what a new record starts with.
- Options: for the two select types, the list of choices, with Add and Remove.
- Required: the field must be filled before the record can be saved.
- Show Under Collapse: hide the field behind a collapsed section on the record.
3. Where the fields appear
A field appears on every record of that module, including the ones that already existed, with an empty value until someone fills it in. Adding a field never changes data you already have.
Fields show on the record's custom fields tab, grouped by category. Fields assigned to a custom tab appear on that tab instead.
4. Custom fields and bulk import
This is the part worth reading before you start.
The import template is generated at the moment you download it. It contains a Custom fields section built from the custom fields that exist for that module right then, alongside the standard sections (Third Party, Address, Contact Details, Details, Finances, External Context and, where it applies, DORA).
Three consequences follow.
If no custom fields exist yet, the template has no Custom fields section at all. There is nowhere in the file to put those values.
If you add fields after downloading, your file has no column for them — and the import will not tell you. Columns the platform does not find are skipped without a warning. The import finishes, reports success, creates your vendors, and every custom field is empty.
A second import will not fix it. The import only ever creates records. If a third party already exists, the row is rejected as a duplicate, and it is checked on three things independently: the third-party name, the DUNS number and the internal reference ID. So you cannot re-upload the same vendors to fill the fields in afterwards. What is left is opening each vendor and typing the values by hand.
So: create your custom fields first, then download the template, then import. If you have already imported and the fields came in empty, expect manual work — and tell us, because we would rather help than have you retype a catalogue.
5. Filling in the columns correctly
The column heading is the field's internal name, not its label. A field labelled Vendor tier becomes a column called vendor_tier. The internal name is generated from the label when the field is created and does not change if you rename the field later, so a long-lived field's column can look unfamiliar.
What each type expects:
Field type | Column in the template |
|---|---|
Select, Model select | A dropdown, with each option shown as |
Toggle | A dropdown of |
Text, Wysiwyg, Date | Free text |
Use the dropdown the template gives you. The value in brackets is what the platform matches on, which is why picking from the list always works. If you type an option name by hand instead, it has to match the option's English label exactly — so a translated or slightly reworded value silently arrives empty.
For Allow Multiple Values, separate the chosen options with a comma in the one cell.
Note: an export is not a valid import template. Exports head their custom field columns with the field's label, while the import expects the internal name. Where the two differ the columns are skipped. Always start from a freshly downloaded template.
6. Changing a field later
You can always change a field's Label, Tooltip, Placeholder, Description, Default Value, Category, Tab and its Options.
Once a field holds values on at least one record, its Field Type and Module are locked. They stay visible but greyed out:
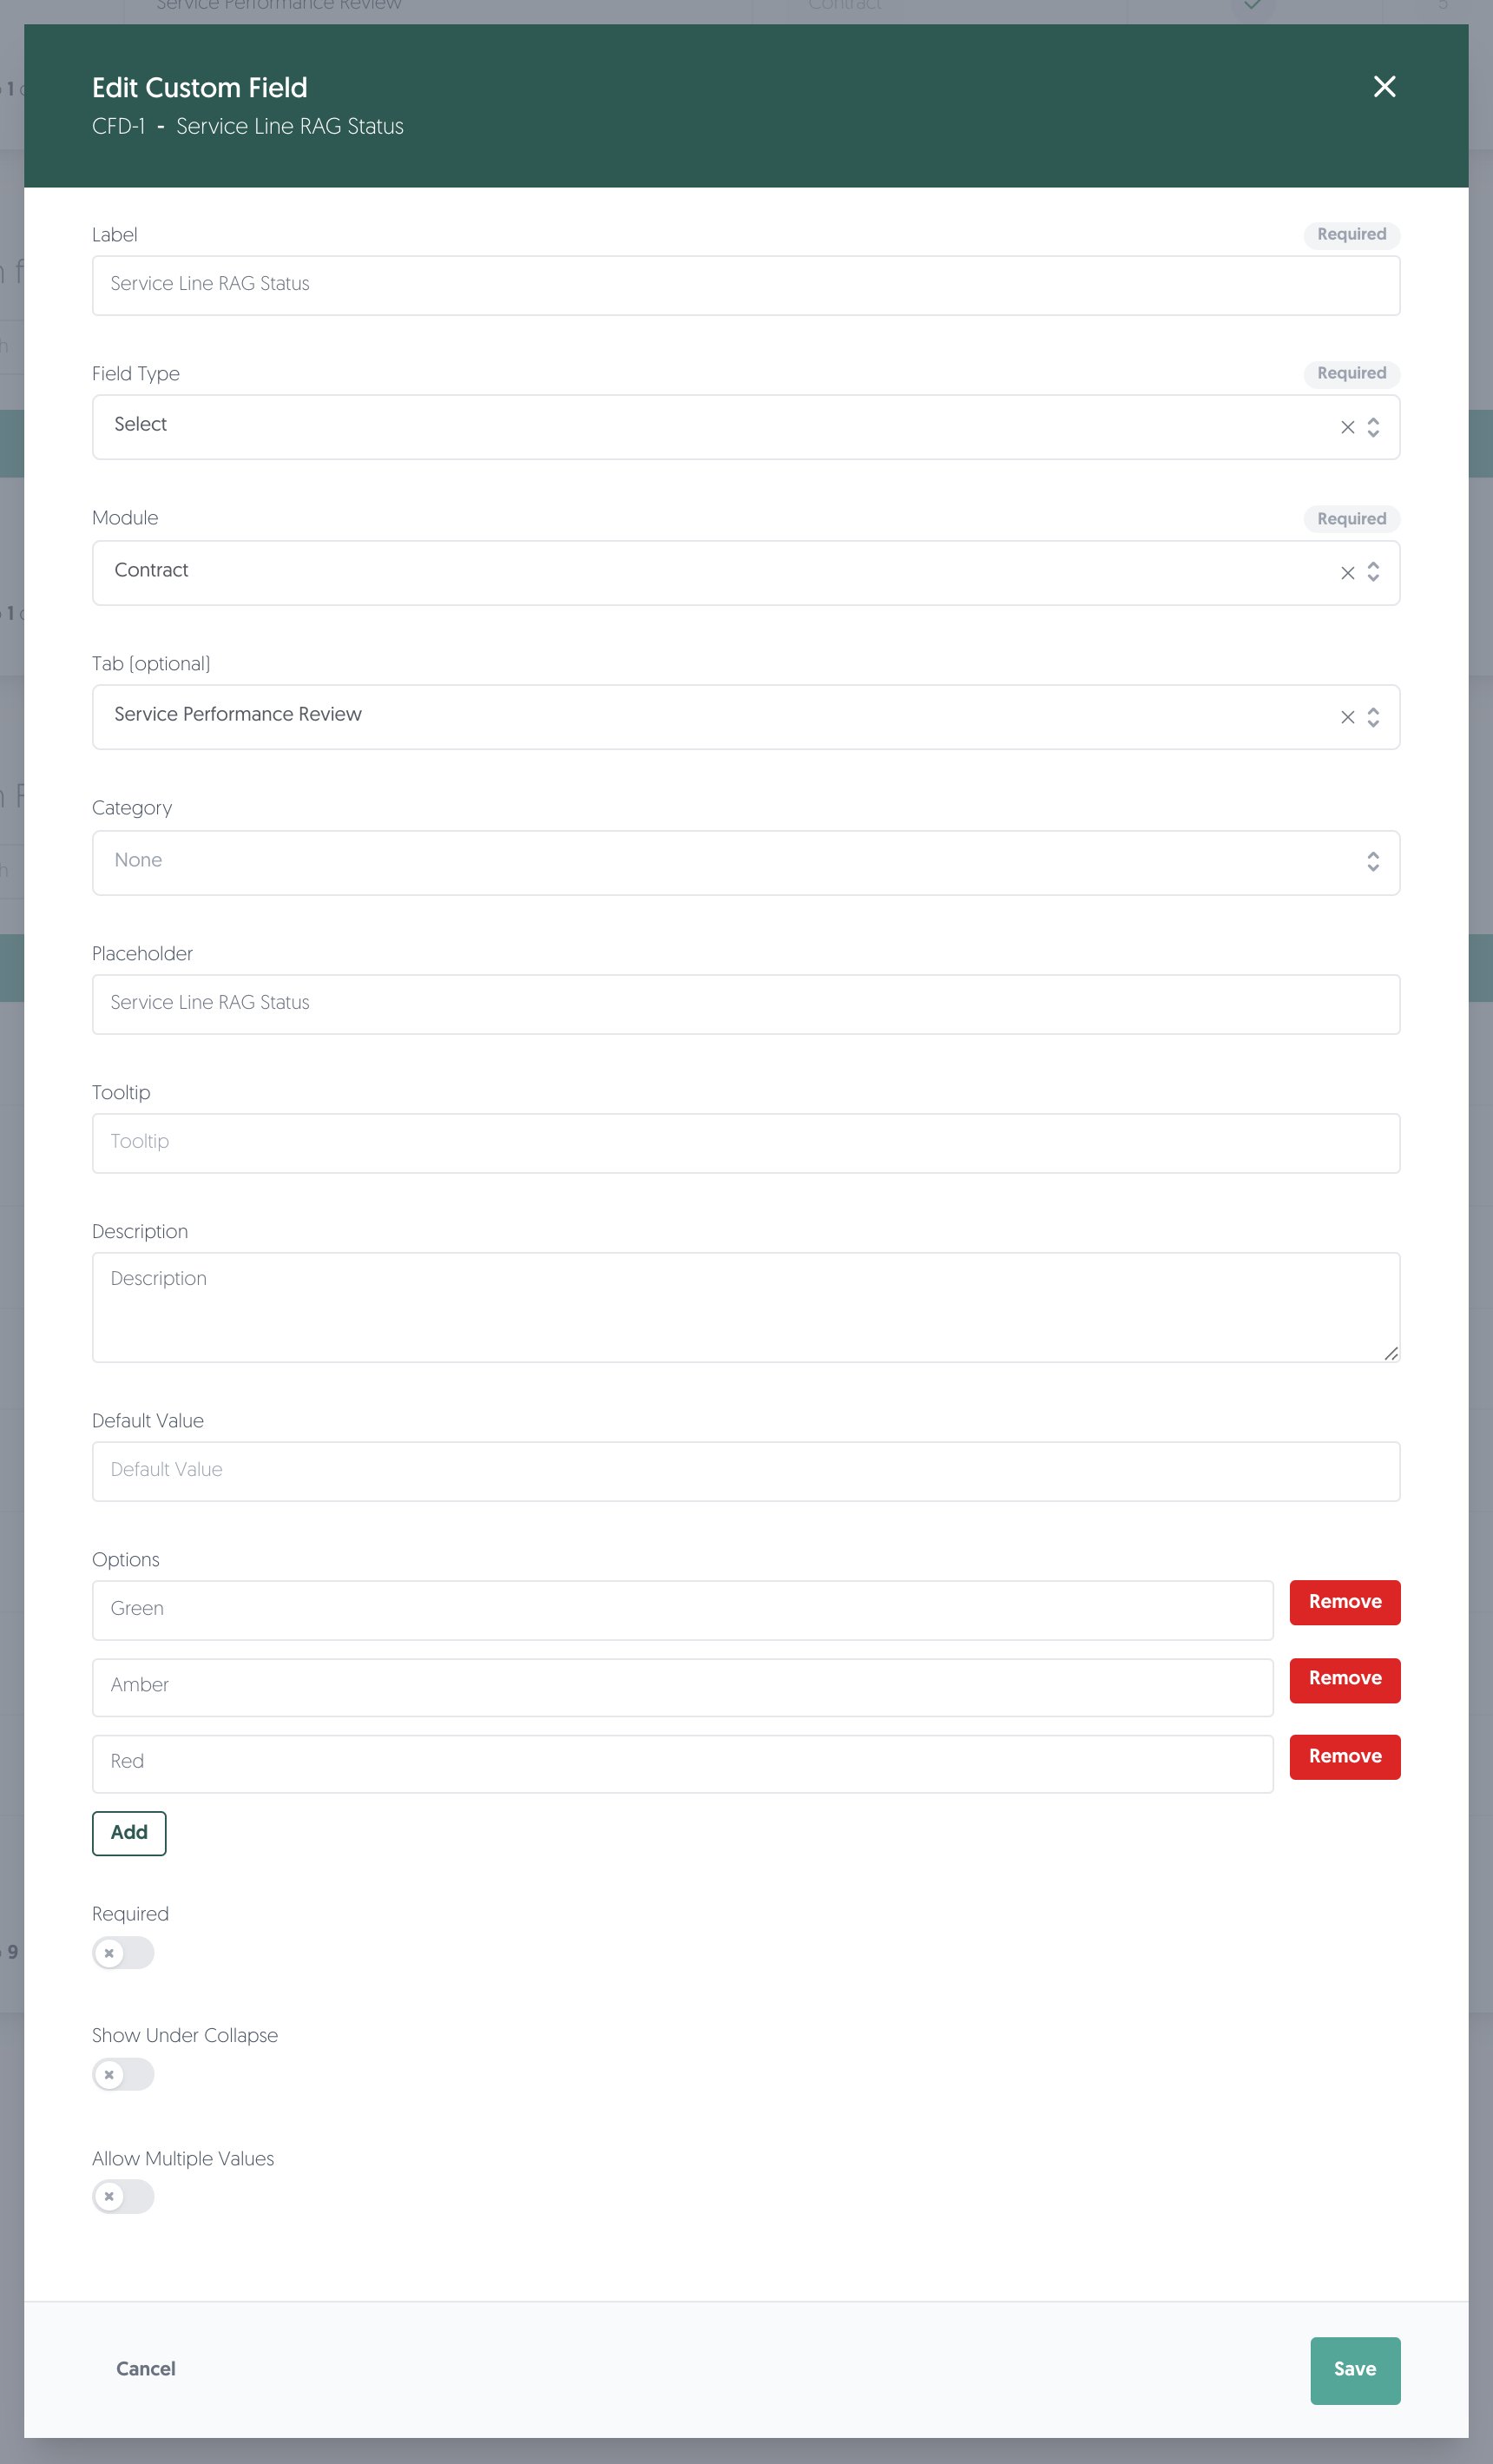
Above: a field with no values yet — Field Type and Module can still be changed.
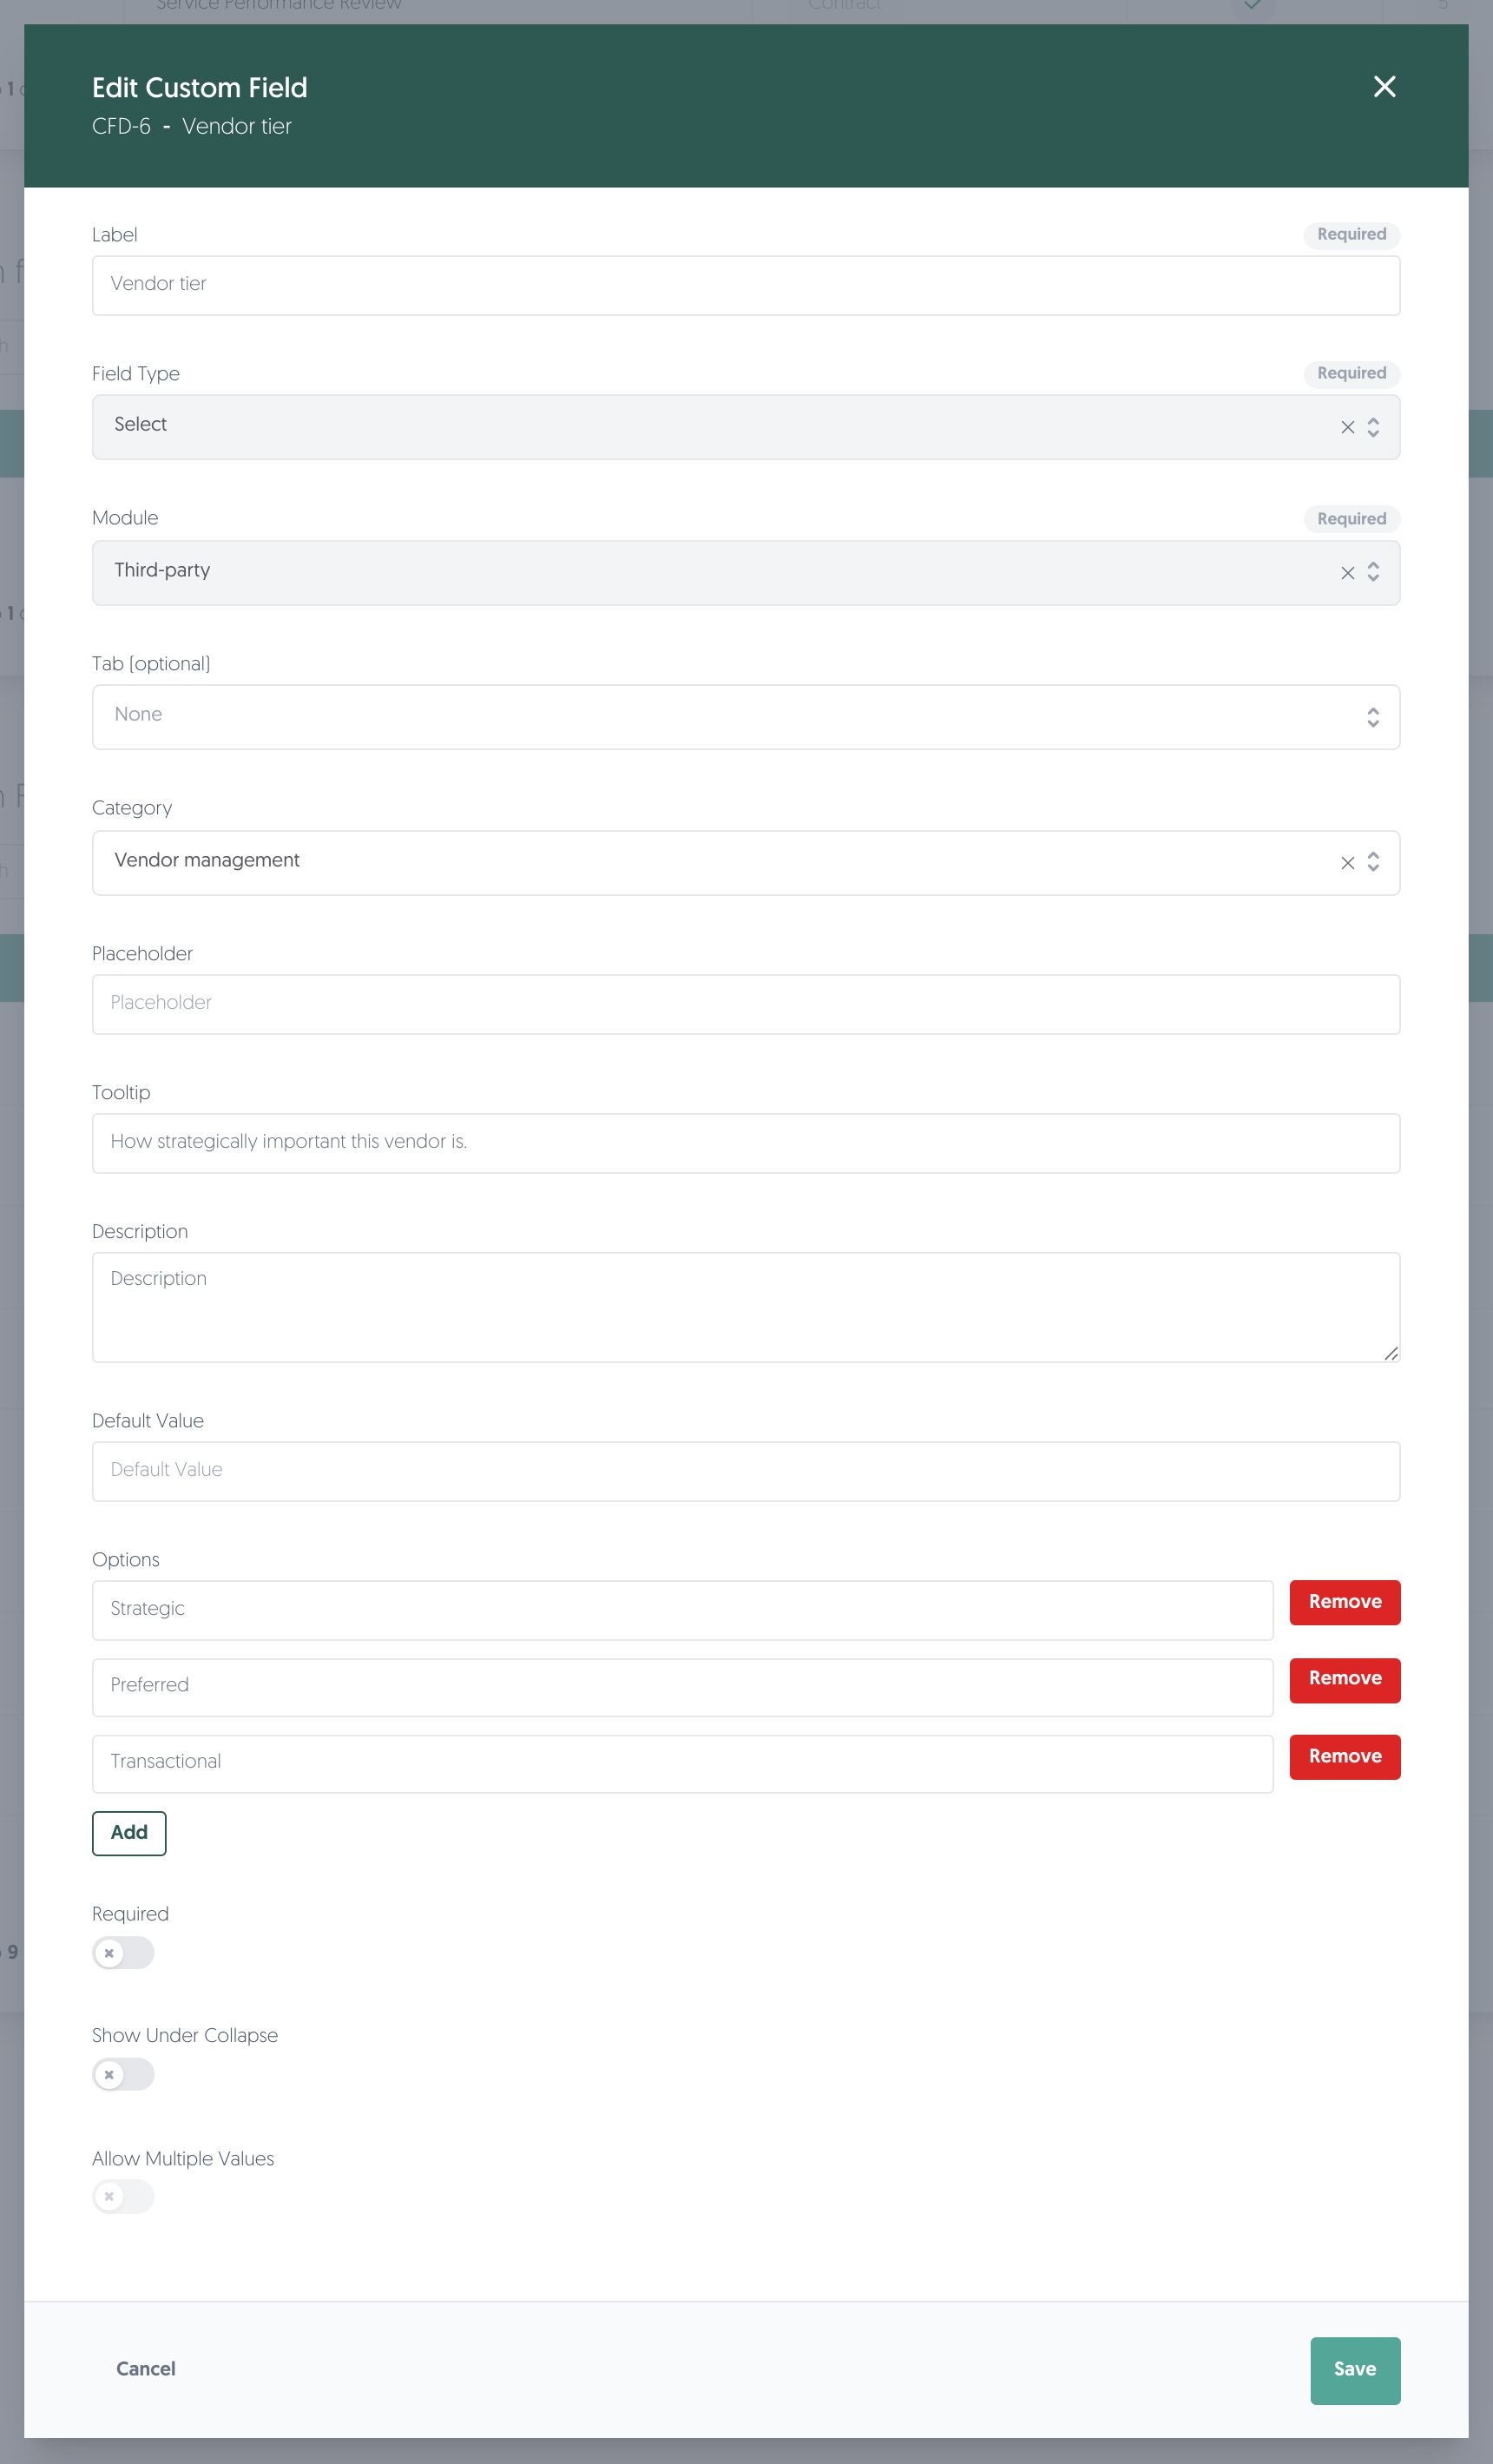
Above: the same screen for a field that is in use — Field Type and Module are greyed out.
This is the second reason to think before you create fields in bulk: a field of the wrong type cannot be converted once your colleagues start using it.
7. Archive and delete
- Archive takes the field off the records without losing anything, and it can be restored.
- Delete removes the field permanently, and cannot be undone.
Both are blocked while the field is in use:
- Archiving reports "This custom field is currently in use and cannot be archived."
- Deleting reports how many records still hold a value, and refuses.
If some of those records are archived, the message says so too, and asks you to restore them first so you can reach the values and clear them. Clear the values, and the field becomes archivable and deletable again.
Permissions needed
Permissions needed: Custom fields — Read to open the page, Create to add a field, Update to change one, Archive to archive and restore, and Delete to remove one permanently.
To grant it, navigate to: Left menu: Configuration, then Roles, open the role, and set the Custom fields permissions. Managing roles is described in Users.
Known limitations
- Custom fields exist for third parties, contracts and external registration forms only. Risks and controls do not have them.
- The import template is a snapshot. Add or rename a field and any template you downloaded earlier is out of date. Download a fresh one.
- A missing custom field column is not reported. The import succeeds and the values stay empty, so check a couple of records after a large import.
- Bulk import cannot update existing records. It only creates, and rejects duplicates on third-party name, DUNS number and internal reference ID.
- The field type cannot be changed once the field is in use, and the field cannot be archived or deleted until its values are cleared.
- Renaming a field does not rename its template column.